Catalog
Update: This documentation has been updated as of 4/13/2022 to include the option of limiting the catalog to only show books that appear in the store's Local Store Inventory file.
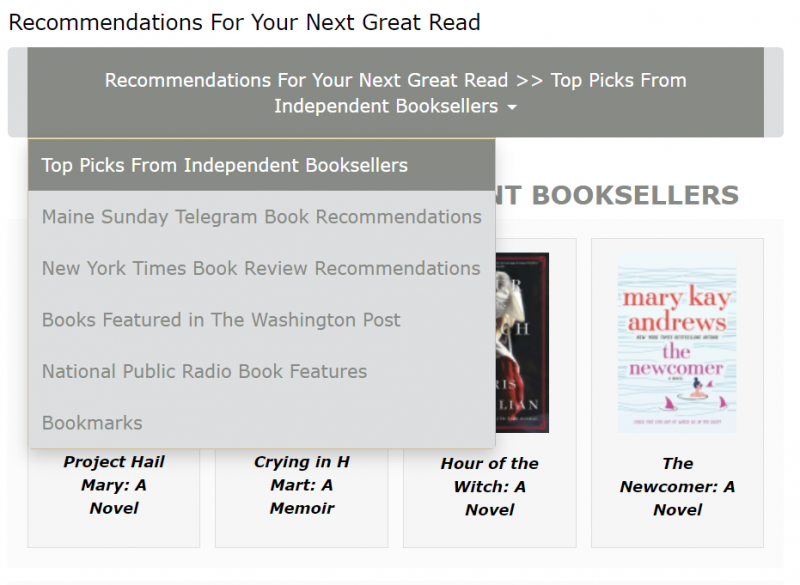
This feature allows stores to build Catalogs - organized collections of books, grouped into different sub categories, navigated with a dropdown menu. The menu will also display the subcategory that is currently being displayed, making it easy for customers to identify which page of the catalog they are on. Stores can use this Catalog feature for Staff Picks, Bestsellers, Book Fairs etc.
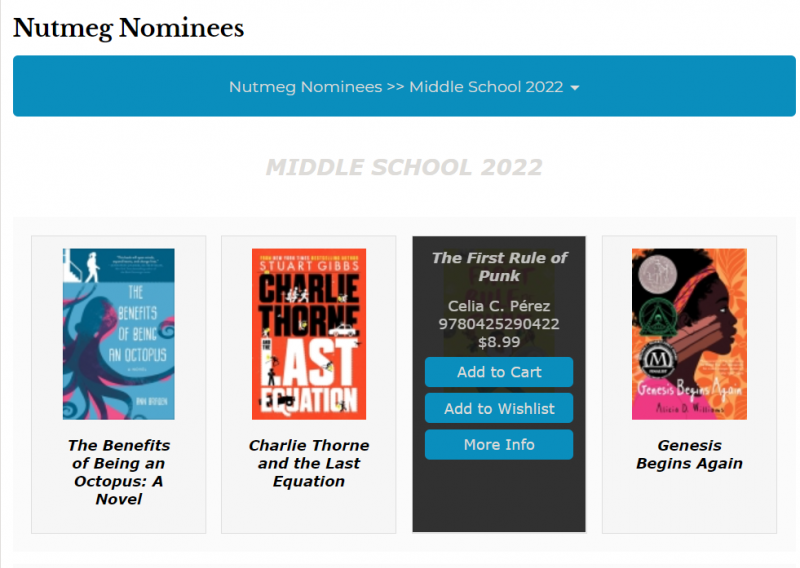
The Catalog will have a clean, mobile friendly layout, with book cover images organized into rows. ‘Add to Cart’ and ‘Add to Wishlist’ options will be available on mouse over, making it possible to shop from the catalog without leaving the page.
Catalogs can be created with regular books and with custom products. Stores can create multiple catalogs. When a book is purchased from the catalog, the link to the catalog's subcategory will be included below the book title on orders and invoices. This helps make it clear when a customer has purchased a title from within a catalog.
Components of the Catalog
-
Catalog Name: The name of the catalog. The catalog contains all subcategories, their ISBNs, and their banner images.
-
Catalog Cover Image: The banner image for the entire catalog. This will be the "cover" of the catalog.
-
Subcategory: A section of the catalog. It can also be helpful to think of subcategories as ‘pages’ in the catalog.
-
Subcategory Name: The name of the subcategory (or section).
-
ISBNs: The titles associated with the subcategory. These can only be ISBNs that are available through Ingram. Custom products and store books cannot be added.
-
Banner Image: The image for the subcategory. These are unique to each subcategory and can be changed at any time.
-
Description (NEW): The description for the subcategory. This area comes with a WYSIWYG editor. We highly recommend stores use this area to upload banner images for the catalog in order to include Alt-Text.
Creating a New Catalog
Each Catalog can have multiple ‘Subcategories’. Subcategories contain a title, a booklist, and a spot for a banner image. Once created, subcategories are navigated to using the dropdown menu on the catalog .
-
Go to Content > Catalog List
-
Click ‘Create New’
-
Enter a Catalog Name (Ex: Bestsellers)
-
To upload a Catalog Cover Image click Choose File. This step is optional as catalog cover images are not required.
-
Begin creating your first subcategory by entering a Subcategory Name (Ex: Fiction, Nonfiction, Children’s, etc.)
-
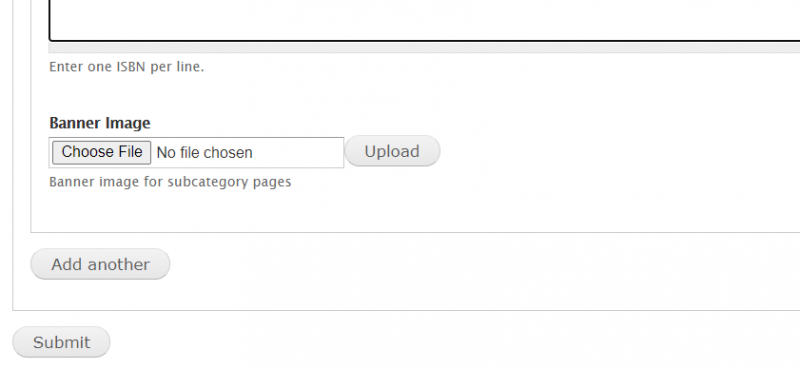
Enter your list of ISBNs, one per line
-
To upload a Banner Image to the subcategory click Choose File. This step is optional as banner images are not required.
-
Select your banner image file and click ‘Upload’
-
Add a description to the subcategory using the Description field. (Note: You can also use this field to upload your banner image if you would like to include Alt Text. This can be used instead of the Banner Image Upload.)
-
Click ‘Add Another’ to add another subcategory
-
Repeat steps 1-7
-
When you are finished building your catalog click ‘Submit’ to save your content
-
View the Catalog and make sure it looks right
Adding a Menu Link for the Catalog
To link customers to your catalog, you can add the catalog as a menu link to your website. For full directions and more information on how to manage menus please click
here.
-
Navigate to Structure > Menus > Main Menu > Add Link
-
Menu Link Title - This is the title that will display in the main menu, such as Store Catalog or Staff Pick Catalog
-
Description - This will display when hovering over the link
-
Set your ‘Parent Item’ if applicable
-
Save
-
Navigate to Structure > Menus > Main Menu to ensure your catalog menu link is placed correctly. If needed, you can drag and drop your menu link into the appropriate space.
Editing Catalogs
To edit a catalog, navigate to Content > Catalog List. This will take you to a list of all your catalogs that have been created and will also list their corresponding subcategories.
Only Show In Stock Books
You can choose to only show books that appear as in stock in your
Local Store Inventory file. To do so, navigate to
Content > Catalog List > Configure and check the box labeled "
Show only books in stock that appear in your Local Store Inventory file".
Please note that this option will apply to all catalogs that you have created and cannot be changed between catalogs. This option will also only apply to regular books and will not apply to custom products.
Change the Color of Catalogs
For sites using our
Santa Rosa or
Flatland themes, the catalog color will automatically be adjusted to match the selected color palette of the theme. If you would like, you can change the color of the catalog which will change the text and the background color of your catalogs. These color choices will be applied to all catalogs and can not be changed for individual catalogs.
-
Navigate to Content > Catalog List > Configure
-
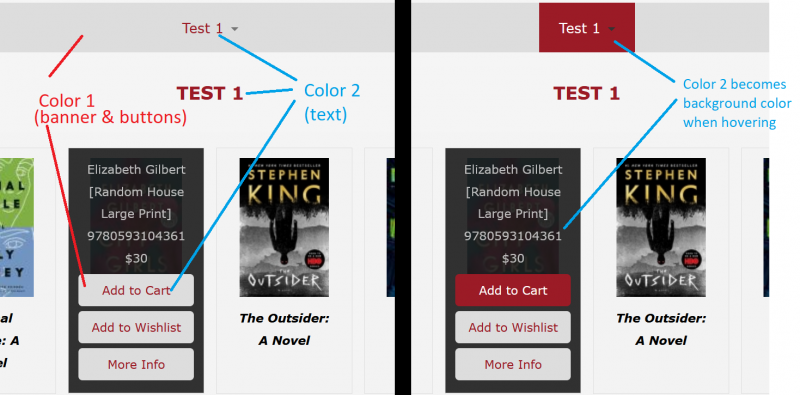
Click inside the box on Catalog color 1 to bring up the color selector.
-
Select your color. This will be the main background color for the banner and buttons.
-
Click inside the box on Catalog color 2 to bring up the color selector.
-
Select your color. This will be the main text color and hover color when rolling over a link.
-
Click ‘Save configuration’
This colors will display in every catalog and invert upon hovering over a clickable link or button:
Add or Remove ISBNs
-
Navigate to Content > Catalog List.
-
Click ‘edit’ on the catalog line under the ‘Action’ column on the right hand side.

-
Add or delete titles as needed within the ISBN lists of the subcategories.
-
This feature takes one ISBN per line. Removing an ISBN from the list will delete it from the catalog; adding an ISBN will include it in the catalog.
-
‘Submit’ your changes at the bottom of the page to apply the edit(s).
Add or Remove a Subcategory
-
Navigate to Content > Catalog List.
-
Click ‘edit’ on the catalog line.
-
Scroll down to the last category created. Beneath the banner upload, there are two buttons: ‘Add another’ and ‘Remove last’.
-
If you need to add a subcategory click ‘Add Another’.
-
This will create a new empty catalog form that can be filled out and populated with desired ISBNs and another banner image.
-
If you need to remove a subcategory click ‘Remove Last’.
-
Be aware, clicking ‘Remove Last’ will delete the last subcategory created. Be sure to save any lists of ISBNs if you need to edit a subcategory that is higher up in the catalog.